Recently, I decided to begin the process of retiring my Ubiquiti EdgeRouter Infinity, for a number of reasons, including the fact that I don’t have a spare and the availability and pricing of these routers has only gotten worse with each passing year. I wanted to replace this setup with something that could be more easily swapped in the event of a failure, and having been a former PFSense (and even former Monowall) user years ago, I decided to give OPNsense a try.
I ordered some equipment which provided a good compromise between enterprise grade, lots of PCIe slots, cost, and power efficiency. I ended up building a system with an E5-2650L v3 processor and 64GB of RAM. I decided to start by installing Proxmox, allowing me to make this into a hub for network services in the future rather than just a router. Afterall, I have a Proxmox cluster in my server rack, Proxmox VM’s are easy to backup and restore, and even inside of virtual machines, I have always found the multi-gig networking to be highly performant. This all changed when I installed OPNsense.
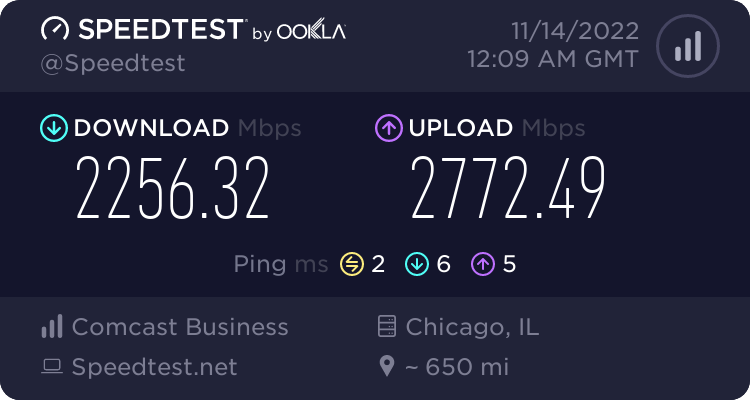
Earlier this year, my Internet was upgraded to 6Gbps (7Gbps aggregate between my two hand-offs). This actually was another factor in my decision to go back to using a computer as a routerI, there are rumors of upgrades to 10Gbps and beyond in the pipeline, and I want to be prepared in the future with a system that will allow me to swap in any network hardware I want.
I’d assumed that modern router software like this should have no problem handling multi-gigabit connectivity, especially on such a powerful system (I mean I built an E5 server…), but after installing OPNsense in my Proxmox VM and trying to use it on my super fast connection, I was instantly disappointed. Out of the box, the best I could do was 2-3Gbps (about half of my speed).
Through the course of my testing, I realized that even testing with iperf from my OPNsense VM to other computers on my local network, the speeds were just as bad. So why was OPNsense only capable of using about 25% of a 10Gbps network connection? I spent several days combing through articles and forum threads trying to determine just that, and now I am compiling my findings for future reference. Hopefully some of you reading this will now save some time.
I did eventually solve my throughput issues, and I’m back to my full connection speed.
Ruling out hardware issues…
I know from my other hypervisor builds that Proxmox is more than capable of maxing out a 10Gbps line rate with virtual machines… and my new hypervisor was equipped with Intel X520-DA2I cards, which I know have given me no issues in the past.
Just to rule out any issues with this hardware I’d assembled, I created a Debian 11 VM attached to the same virtual interfaces and did some iperf testing. I found that the Debian VM had no problems performing as expected out of the box, giving me about 9.6Gbps on my iperf testing on my LAN.
Proxmox virtual networking issues in OPNsense\FreeBSD?
Throughout the course of my research, I found out to my dismay that FreeBSD seemed to have a history of performance issues when it comes to virtual network adapters – not just Proxmox, but VMWare as well.
Some sources seemed to suggest that VirtIO had major driver issues in FreeBSD 11 or 12 and I should be using E1000. Some sources seemed to suggest that VirtIO drivers should be fixed in the release I was using (which was based on FreeBSD 13).
I tested each virtual network adapter type offered in the Proxmox interface: VirtIO, E1000, Realtek RTL8139, and VMWare vmxnet3.
Out of the box with no performance tuning, VirtIO actually performed the best for me by far. None of the other network adapter types were even able to achieve 1Gbps. VirtIO was giving me about 2.5Gbps. So, I decided to proceed under the assumption that VirtIO was the right thing to use, and maybe I just needed to do some additional tuning.
Throughout the course of my testing, I also tested using the “host” CPU type versus KVM64. To my great shock, KVM64 actually seemed like it performed better, so I decided to leave this default in place. I did add the AES flag (because I am doing a lot of VPN stuff on my router, so might as well) and I did decide to add the Numa flag, although I don’t think this added any performance boost.
OPNsense Interface Settings, hardware offload good or bad?
It seems like the general consensus is, somewhat counter intuitively, that you should not enable Hardware TSO or Hardware LRO on a firewall appliance.
I tried each one of these interface settings individually, and occasionally I saw some performance gains (Hardware LRO gave me a noticeable performance boost), but some of the settings also tremendously damaged performance. The network was so slow with Hardware VLAN filtering turned on that I couldn’t even access the web UI reliably. I had to manually edit /conf/config.xml from the console to get back into the firewall.
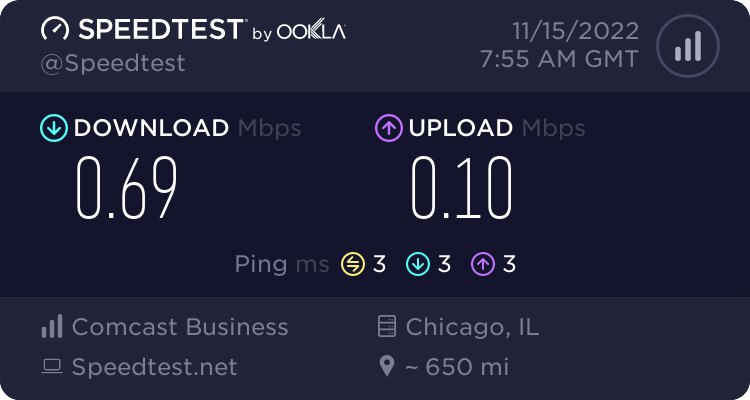
I experienced some very strange issues with the hardware offloading. In some situations, the hardware offloading would help the LAN side perform significantly better, but the performance on the WAN side would take a nosedive. (I’m talking, 8Gbps iperf to the LAN, coinciding with less than 1Mbps of Internet throughput).
As a result of all these strange results, I later decided that the right move was to leave all of this hardware offloading turned off. In the end, I was able to achieve the above performance without any of it enabled.
OPNsense\FreeBSD, inefficient default sysctl tunables?
My journey into deeper sysctl tuning on FreeBSD began with this 11 page forum thread from 2020 from someone who seemed to be having the same problem as me. Other users were weighing in, echoing my experiences, all equally confused as to how OPNsense could be performing so poorly, with mostly disinterested responses from any staff weighing in on the topic.
It was through the forums that I stumbled on this very popular and well respected guide for FreeBSD network performance tuning. I combed over all of the writing in this guide, ignoring all of the ZFS stuff and DDoS mitigation stuff, focusing on the aspects of the write-up that aimed to improve network performance.
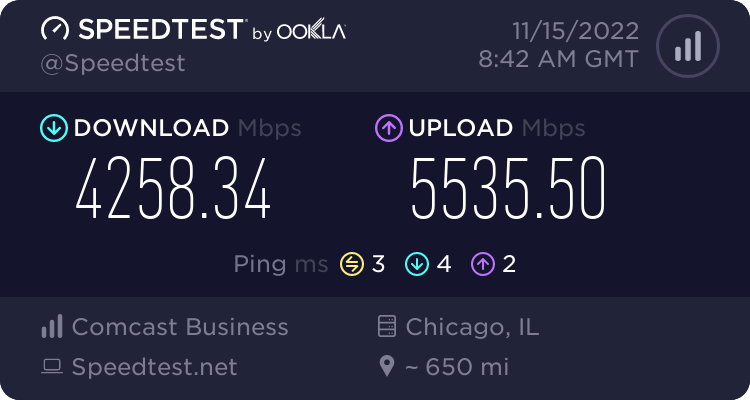
After making these adjustments, I did see a notable improvement, I was now able to achieve about 4-5Gbps through the OPNsense firewall! But, my full Internet speed was still slightly eluding me, and I knew there had to be more that I could do to improve the performance.
I ended up reading through several other posts and discussions, such as this thread on Github, this thread on the OPNsense forum about receive side scaling, the performance tuning guide for PFsense, a similar FreeBSD based firewall solution from which OPNsense was forked, a very outdated thread from 2011 about a similar issue on PFsense, and a 2 year old Reddit thread on /r/OPNsenseFirewall about the same issue.
Each resource I read through listed one or two other tunables which seemed to be the silver bullet for them. I kept changing things one at a time, and rebooting my firewall. I didn’t keep that great of track of which things made an impact and which didn’t, because as I read what each thing was, I generally agreed that “yeah increasing this seems like a good idea”, and decided to keep even modifications that didn’t seem to make a noticeable performance improvement.
Perhaps you are in a position where you want to do more testing and narrow down which sysctl values matter for your particular setup, but I offer this as my known working configuration that resolved the speed issues for me, and which I am satisfied with. I have other projects to move on to and have spent more than enough time on this firewall one, it’s time to accept my performance gains and move on.
Configuration changes I decided to keep in my “known good” configuration.
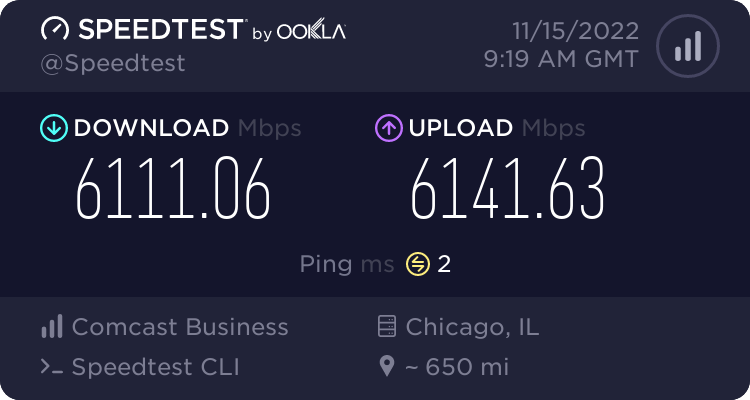
If you haven’t enjoyed my rambling journey above of how I got here, then this is the part of this guide you’re looking for. Below are all of the configuration changes I decided to keep on my production firewall, the configuration which yielded the above speed test exceeding 6Gbps.
If you’re doing what I’m doing, you’re sitting with a default OPNsense installation inside of a Proxmox virtual machine, here’s everything to change to get to the destination I arrived at.
Proxmox Virtual Machine Hardware Settings – Machine Type
I read conflicting information online about whether q35 or i440fx performed better with OPNsense. In the end, I ended up sticking with the default i440fx. I didn’t notice any huge performance swing one way or another.
Proxmox Virtual Machine Hardware Settings – CPU


- Leave the CPU type as “KVM64” (default). This seemed to provide the best performance in my testing.
- I matched the total core count with my physical hypervisor CPU, since this will be primarily a router and I want the router to have the ability to use the full CPU.
- I checked “Enable NUMA” (but I don’t think this improved performance any).
- I enabled the AES CPU flag, with the hope that it might improve my VPN performance, but I didn’t test if it did. I know it shouldn’t hurt.
Proxmox Virtual Machine Hardware Settings – Network Adapters
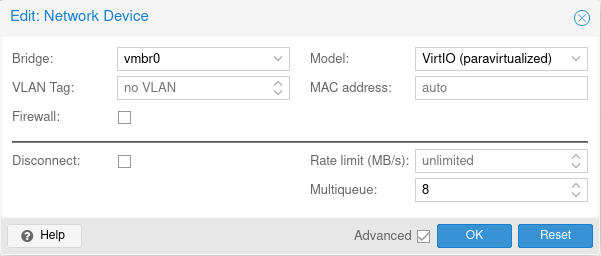
- Disable the Firewall checkbox. There is no need for Proxmox to do any firewall processing, we’re going to do all our firewall work on OPNsense anyway.
- Use the VirtIO network device type. This provided the best performance in my testing.
- Set the Multiqueue setting to 8. Currently, 8 is the maximum value for this setting. This provides additional parallel processing for the network adapter.
OPNsense Interface Settings
The first and most obvious settings to tinker with were the ones in Interfaces > Settings in OPNsense. As I wrote above, these provided mixed results for me and were not very predictable. In the end, after extensively testing each option one by one, I decided to leave all the hardware offloading turned off.

OPNsense Tunables (sysctl)
After testing a number of tunable options (some in bulk, and some individually), I arrived at this combination of settings which worked well for me.
These can probably be adjusted in configuration files if you like, but I did it through the web UI. After changing these values, it’s a good idea to reboot the firewall entirely, as some of the values are applied only at boot time.
The best overall guide which got me the most information was this FreeBSD Network Performance Tuning guide I linked above. I’m not going to go into as much detail here, and not everything set below was from this guide, but it was a great jumping off point for me.
hw.ibrs_disable=1
This is a CPU related tunable to mitigate a Spectre V2 vulnerability. A lot of people suggested that disabling it was helpful for performance.
net.isr.maxthreads=-1
This uncaps the amount of CPU’s which can be used for netisr processing. By default this aspect of the network stack on FreeBSD seems to be single threaded. This value of -1 for me resulted in 24 threads spawning (for my 24 CPU’s).
net.isr.bindthreads = 1
This binds each of the ISR threads to 1 CPU core, which makes sense to do since we are launching one per core. I’d guess that doing this will reduce interrupts.
net.isr.dispatch = deferred
Per this Github thread I linked earlier, it seems that changing this tunable to “deferred” or “hybrid” is required to make the other net.isr tunables do anything meaningful. So, I set mine to deferred.
net.inet.rss.enabled = 1
I decided to enable Receive Side Scaling. This didn’t come from the tuning guide either, it came from an OPNsense forum thread I linked earlier. In a nutshell, RSS is another feature to improve parallel processing of network traffic on multi-core systems.
net.inet.rss.bits = 6
This is a receive side scaling tunable from the same forum thread. I set it to 6 as it seems the optimal value is CPU cores divided by 4. I have 24 cores, so 24/4=6. Your value should be based on the number of CPU cores on your OPNsense virtual machine.
kern.ipc.maxsockbuf = 614400000
I grabbed this from the FreeBSD Network Performance Tuning Guide, this was their recommended value for if you have 100Gbps network adapters. The default value that came shipped with my OPNsense installation corresponded with the guide’s value for 2Gbps networking. I decided since I may want to expand in the future, I would increase this to this absurd level so I don’t have to deal with this again. You may want to set a more rational value, 16777216 should work for 10Gbps. The guide linked above goes into what this value does and other values it effects in great detail.
net.inet.tcp.recvbuf_max=4194304
net.inet.tcp.recvspace=65536
net.inet.tcp.sendbuf_inc=65536
net.inet.tcp.sendbuf_max=4194304
net.inet.tcp.sendspace=65536
These TCP buffer settings were taken from the FreeBSD Network Performance Tuning Guide, I didn’t look into them too deeply but they were all equivalent or larger buffers than what came shipped on OPNsense, so I rolled with it. The guide explains more about how these values can help improve performance.
net.inet.tcp.soreceive_stream = 1
Also from the tuning guide, this enables an optimized kernel socket interface which can significantly reduce the CPU impact of fast TCP streams.
net.pf.source_nodes_hashsize = 1048576
I grabbed this from the tuning guide as well, it likely didn’t help with my problem today, but it may prevent problems in the future. This increases the PF firewall hash table size to allow more connections in the table before performance deteriorates.
net.inet.tcp.mssdflt=1240
net.inet.tcp.abc_l_var=52
I grabbed these values from the tuning guide which are intended to improve efficiency while processing IP fragments. There are slightly more aggressive values you can set here too, but it seems these are the more safe values, so I went with them.
net.inet.tcp.minmss = 536
Another tuning guide value which I didn’t look into too heavily, but it configures the minimum segment size, or smallest payload of data which a single IPv4 TCP segment will agree to transmit, aimed at improving efficiency.
kern.random.fortuna.minpoolsize=128
This isn’t related to the network at all, but it was a value recommended by the tuning guide to improve the RNG entropy pool. Since I am doing VPN stuff on this system, I figure more RNG is better.
net.isr.defaultqlimit=2048
This value originated from my earlier linked Reddit thread, it was quickly added during the last batch of tunables that finally pushed me over the edge in terms of performance, and I decided I’d leave it even if it wasn’t doing anything meaningful. Increasing queuing values seems to have been a theme of the tuning overall.
Good enough for now!
With all of the above changes, I achieved my desired performance with OPNsense, running in a KVM virtual machine on Proxmox.
I’d imagine that these same concepts would apply well to any FreeBSD based router solution, such as PFsense, and some could even apply to other FreeBSD based solutions common in homelab environments, such as FreeNAS. However, it appears in my research that OPNsense is unique limited in its performance (more limited than stock FreeBSD 13). So, your mileage may vary.
The above is not intended to be a comprehensive guide, I write it both for my future reference, and with the hopes that some of the many folks who seem to be out there having these same performance issues, and being forced to stumble around in the dark looking for answers like I was, might try the settings in my guide and achieve the same great outcome.